Meet the challenge: Design a flat-pack animal that a classmate can assemble and stand up without glue.
Grade 3 · Laser & Vinyl · Lesson 34
Slot-Together Animal
Turn flat shapes into a standing creature with simple cross-slots.
Time2 × 60 minutes + adult laser cuttingTeamsTeams of 2–4EquipmentxTool laser cutters
Project inspiration · 3 images
See, build, and test
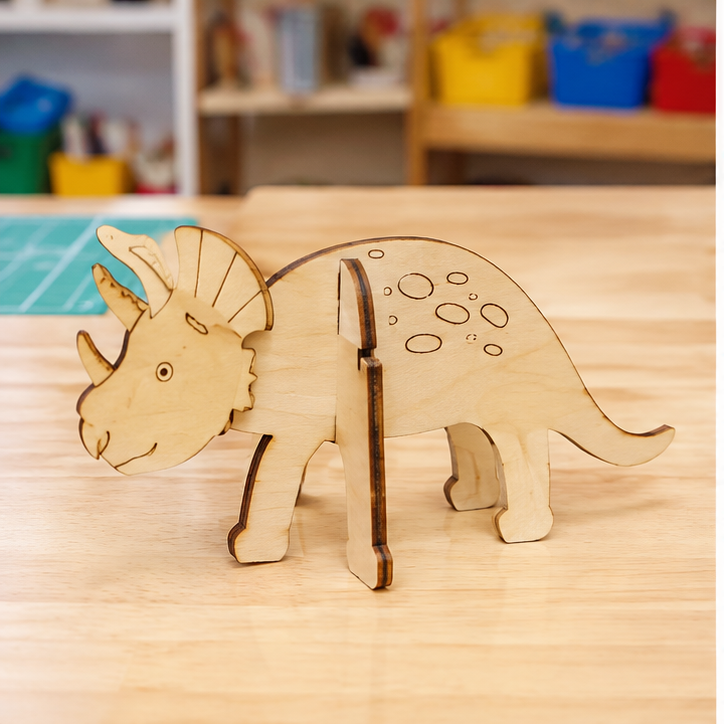
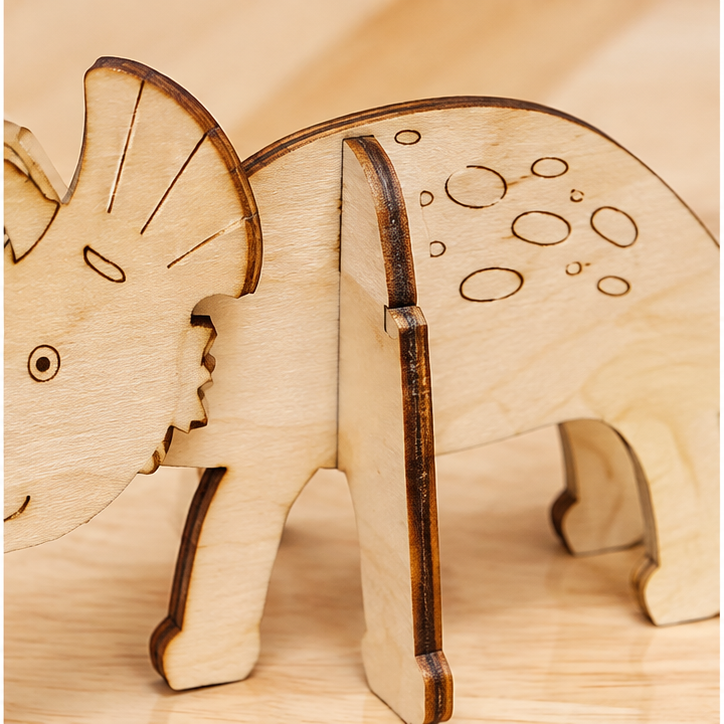
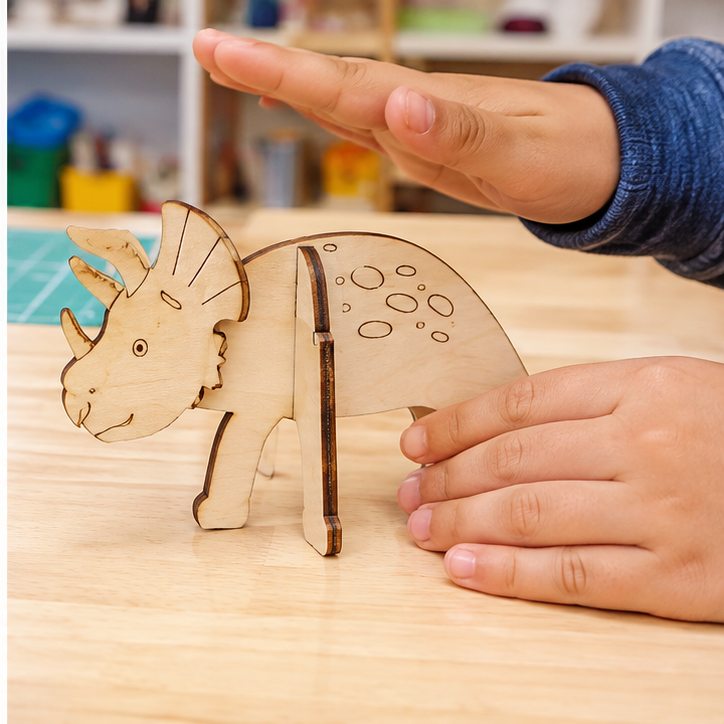
Use these images to understand the kind of making, details, and testing involved. They are inspiration—not designs students must copy.
Student quick guide
What are we doing?
Sketch two ideas and make a paper or cardboard test version.
Test it the same way each time: assemble the animal three times and give it the same gentle table-tap test. Fix one part before the adult laser-cuts the final design.
For teachers
Engineering standards
This shows how the lesson connects to the national NGSS engineering standards and what student work you can collect.
Assessed
3-5-ETS1-1
Teams define the user or purpose and identify measurable success criteria plus size, material, and time limits.
What students show: Problem statement with criteria, constraints, and a labeled planning sketch.Practiced
3-5-ETS1-2
Students draw and compare at least two possible shapes, layouts, or joining methods before choosing a design.
What students show: Two ideas and a criteria-based explanation of the selected features.Assessed
3-5-ETS1-3
Teams prototype in paper or cardboard, assemble the animal three times and give it the same gentle table-tap test, revise one feature, and repeat the test.
What students show: Before-and-after prototype, test notes, and an evidence-based revision statement.Materials
- Animal reference pictures
- Cardboard slot-test strips
- Colored pencils or paint for finishing
- Paper, index cards, or thin cardboard for first prototypes
- Pencils, dark markers, rulers, tape, and child-safe scissors
- Computer or tablet with beginner vector-drawing software
- Teacher-approved laser material such as cardboard, plywood, or acrylic
- Calipers or a teacher-provided material-thickness gauge
Teacher preparation
- Choose and verify one material approved for the exact xTool model; record its measured thickness.
- Prepare a simple demonstration of cut lines, engrave areas, closed paths, and minimum feature size.
- Set up a paper-first prototype station and a material-saving size limit.
- Create the file rule G3_34_Team##_v1.
- Plan an adult-only file check and cutting queue; students observe from the designated safe area.
Step by step
How to teach it
Day 1 · 0–15
Meet the need
- Introduce the mission: Design a flat-pack animal that a classmate can assemble and stand up without glue.
- Name the user or purpose, then agree on criteria and constraints.
- Examine how tabs, slots, outlines, and engraved marks appear in sample pieces.
Day 1 · 15–35
Imagine and compare
- Each student sketches a different solution using simple shapes.
- Teams compare the ideas against the criteria.
- Select or combine features and label all cuts, slots, folds, and engraved details.
Day 1 · 35–60
Prototype first
- Build a full-size paper or cardboard version.
- Use the same test procedure: assemble the animal three times and give it the same gentle table-tap test.
- Find one weak, confusing, loose, or oversized feature and revise it.
Day 2 · 0–35
Make the vector file
- Trace or rebuild the improved design with bold closed paths.
- Measure every slot from the actual material thickness and keep tiny details out.
- Use the teacher checklist for size, line type, loose pieces, naming, and material use.
Day 2 · 35–60
Cut, assemble, and retest
- A trained adult performs the final safety and material check and operates the laser.
- Students assemble the finished parts without forcing joints.
- Repeat the original test, compare results, and explain one next improvement.
Assessment
- Problem statement includes a purpose, criteria, and constraints.
- Two ideas are compared before the final design is chosen.
- Paper or cardboard prototype is tested before final cutting.
- Vector file uses closed paths, readable details, and efficient material placement.
- Revision responds to recorded test evidence.
Supports & extensions
- Provide editable circle, rectangle, tab, slot, and name-tag starter files.
- Offer printed picture directions and a color-coded cut-versus-engrave key.
- Let students draw on paper for an adult or partner to trace digitally.
- Use larger parts, fewer joints, and pre-measured slot options when helpful.
- Extension: nest parts to reduce waste or compare two slot widths using measured fit data.
Safety & responsible use
- Students do not operate the laser cutter.
- A trained adult verifies material identity, settings, focus, ventilation, fire monitoring, and file placement.
- Never laser-cut PVC, vinyl, unknown plastics, unidentified coated materials, or any material not explicitly approved.
- Keep the lid closed during operation and follow the xTool model's required supervision and emergency procedures.
- Check cut edges and splinters before student assembly; use only teacher-approved adhesives and hand tools.
No-machine alternative
Make the final project from cardstock, corrugated cardboard, recycled folders, or foam board using child-safe scissors and teacher-prepared pieces. Keep the same criteria, comparison, test, and revision cycle.
Printable student design brief
The challenge
Design a flat-pack animal that a classmate can assemble and stand up without glue.
Success criteria
- Stands for 30 seconds
- Assembles without glue
- Animal is recognizable and original
Constraints
- Uses 2–4 main pieces
- Fits inside the assigned material rectangle
- No tiny loose details
Engineer’s notes
Our user or purpose is…
Our two ideas are different because…
The test showed…
We changed… because…
Our cut lines are…
Our engraved details are…
Next time we would…